DOWNLOAD THE FREE SURUDESIGNER SOFTWARE TO BEGIN CREATING:
Yearbooks – Photobooks – Photo Cards – Calendars
Business Cards – Scrapbooks – Portfolios – Art Projects
HOW TO DOWNLOAD AND INSTALL:
STEP 1: Click on the Windows or Macintosh download button below.
STEP 2: The software will automatically begin downloading to your computer.
STEP 3: When download is finished, open the .exe file to run software installation.
STEP 4: Once the software is installed, you are free to use and enjoy it at no charge.
SURUDESIGNER USER GUIDE:
Getting Started
Tools
Share A Project
FAQs
GETTING STARTED:
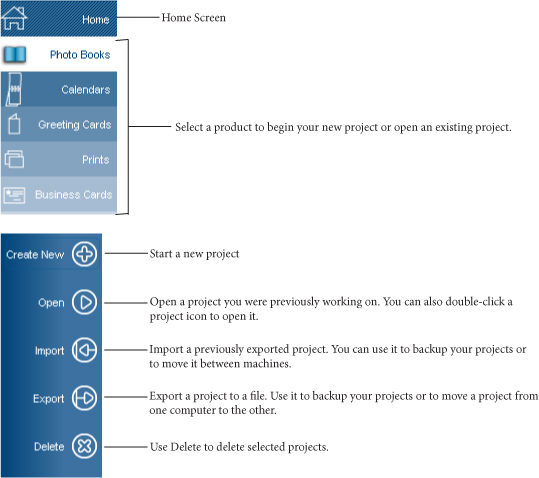
Upon launching SuruDesigner, you will arrive at the main screen. On the left, you will find the product list, listing the types of products you can create. More to the center is your work area. In the work area you will find the current view / project to the right, and the command buttons that apply on his workspace to the left.
The My Photo Creations product list on the left is where you can start one of the fully-customizable projects.
Select the option that fits your project by clicking on the button on the left. Each one of the My Photo Creations buttons leads to a project start page from which you manage your projects.
Once a project type is selected, the main area will switch to a projects view.
The project area on the right shows all projects that were created and saved in the system. The buttons on the left of the project area allows you to perform the desired task on the selected project.
To create a new project, start by selecting the project type from the My Photo Creations project buttons (on the left) and clicking the “Create New” button. This will open the new project wizard. The wizard steps might vary based on the project type. First, select the size of your yearbook/photobook from the options in the pop-up window. Then you can start the project by selecting the “Easy Photobook Wizard” or “Start Empty Book.”
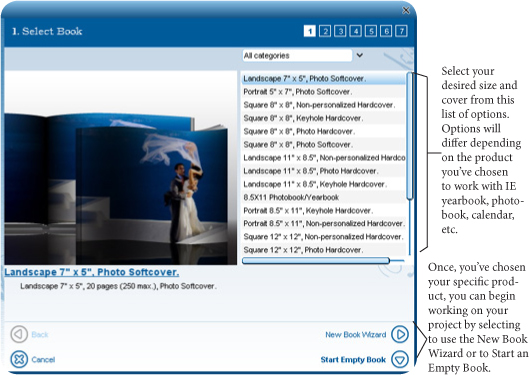
The Easy Photobook wizard will walk you through selecting specific features of your project, add photos for use in project, arrange photos for use in project, and create the project for you. This is the fastest way to create your project. Once created, you can order it as is or do further editing.
The “Start Empty Book” will use your product selection and will start an empty project, leaving all the design work to be done by you.
After you complete the project Wizard or click “Start Empty Book,” you will be taken to your project workplace. Here, you can edit the project using the project specific tools.
When creating your photobook, album or proofbook you can edit the cover page the same way as any page in your project, using the easy drag-and-drop method. You can apply new templates and themes, add text using the text toolbar, or change your cover picture by selecting from the image tray.
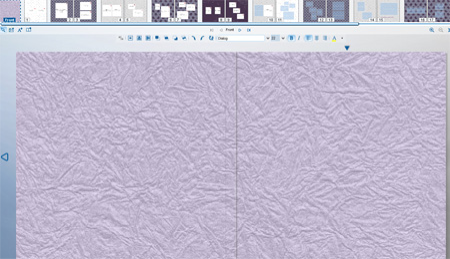
Note that the cover is wived as if the book is placed open and face down. The right side page is the book front cover while the left side page is the book back cover. Between the front and the back you can find the spine.
TOOLS:
In the center of your window is the project workspace. This is where the project design takes place. Use the mouse to complete almost all tasks within the workspace by dragging and dropping photos, right clicking, or selecting from the menus or keyboard shortcuts.
The Image Tray is located at the bottom of the screen. The Image Tray holds images selected to be used in the project.
Use the tools on the left of the tray to perform the following tasks:
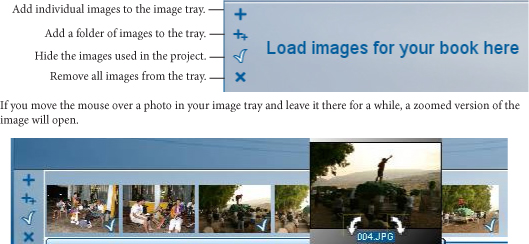
Use the rotate arrows on this view to rotate the image if needed.
Use one of the following cursors
· Simple clicking cursor – used to select items on the page, drag them or resize them.
· Add a picture frame- allows you to add an empty picture frame on the page. Click the mouse and drag it while holding the left mouse button pressed to mark its location.
Add/edit caption allows you to add a text box Click the mouse and drag it while holding the left mouse button pressed to mark its location.
The Output Tray on the top of the screen shows the project from start to finish. A page by page icon of how the printed version will be organized.
Above the output tray you will find the application menu bar and application buttons, such as the order button. Below the output tray you can find two sets of tools. The projects tools, such as zoom or add item; and below, an item context sensitive tool bar. This toolbar offers various different tools, depending what item is clicked on. Images, text, clipart, etc. all have different tools in this task specific toolbar.
The Design Elements Tray is located on the right side of the screen. This area contains design elements that can be used in the project. This area is project specific and will change based on the project type you are working on. Here you will find page layouts, backgrounds, clip arts, themes, and borders.
Once an image that has been dragged-and-dropped into the project is selected, the Image Task Specific Toolbar appears above the project (also accessed by right-clicking the photo). This toolbar offers several options to manage those images. Most of these options are also available by right-clicking the image.
This toolbar offers the following commands:
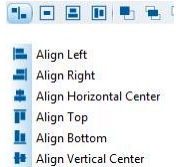
Alignment. When two images are selected at the same time (by holding the Shift key and clicking both images one after the other) then their alignment can be changed with the alignment tool. The images will align with THE FIRST IMAGE SLELCTED as the reference point.
· Align Left- moves second selected image horizontally so that the left side aligns with the left side of the first selected image.
· Align Right- moves second selected image horizontally so that the right side aligns with the right side of the first selected image.
· Align Horizontal Center- moves second selected image horizontally so that the center of its width is lined up with the width center of the first selected image.
· Align Top- moves second selected image vertically so that the top aligns with the top of the first selected image.
· Align Bottom- moves second selected image vertically so that the bottom aligns with the bottom of the first selected image.
· Align Vertical Center- moves second selected image vertically so that the center of its height aligns with the height center of the first selected image.
NOTE: alignment can cause pictures to overlap, depending on their positions.
![]()
Center on Page- moves selected image to vertical and horizontal center of page
· Center Horizontally on Page- moves selected image horizontally so that its horizontal center matches with the horizontal center of the page
· Center Vertically on Page- moves selected image vertically so that its vertical center matches with the vertical center of the page
![]()
Order – Control the order (layers) of objects on the page.
· Bring Forward- brings photo one level more in front
· Send to Front- sends photo all the way in front of the other photos
· Bring Backwards- brings the photo one level behind
· Send to Back- sends the photo behind the other photos
![]()
Rotate image
· Rotate Clockwise- rotates the photo clockwise 90
· Rotate Counter-Clockwise- rotates the photo counterclockwise 90
· Cancel Rotations- returns photo to original position
![]()
Add Drop Shadow- inserts a shadow behind the photo
Zoom Image
· Zoom In- zooms in the photo within the image box
· Zoom Out- zooms out the photo within the image box
Fit Frame to Image- fits the image box so that it shows the entire image
Apply color filter to the image
· Remove Filter- removes all filters from the image
· B&W Filter- applies a black and white filter to the image
· Sepia Filter- applies a sepia filter to the image
Image Fading- increases the transparency of the image selected
Perfectly Clear Image Enhancement – Automatically enhance the image color, skin tone ans sharpness.
On Image Tools:
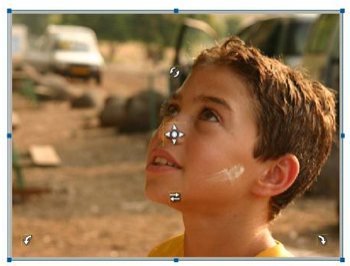
There are tool icons that will also appear on a selected photo that has been added to the project. You can use these tools to manipulate the image as needed.
On image rotation tools allow you to rotate the image within the frame. You can rotate clock-wise, counter clock-wise or free rotation.
The pan tool allows you to move the image inside the image frame. When combined with the zoom feature (accessible from the image tool bar or rolling the mouse wheel), you can zoom the image and place it in the frame, cropping it to your needs.
The switch image tool allows you to switch between any two images. Select this tool and drag from one image to another to switch between the two.
The Text Task Specific Toolbar appears above the project after dragging out a new text box or selecting an existing text box (also accessed by right-clicking the photo). This toolbar offers several options to manage text. This toolbar offers the following commands:
![]()
Font properties
· Font- drops down a menu of different font options
· Size- drops down a menu of different font sizes
· Style – Select the text style
Align the text within the text box
· Align left – aligns text inside box to the left edge of the box
· Align center – aligns text inside box to center of box.
· Align right – aligns text inside box to the right of the box.
Text color – drops down color palette for selecting font color.
ADDITIONAL TOOLS HELP AND ADVICE:
It is easy to be creative by simply dragging and dropping anything (from images to backgrounds, and even clipart) from the image tray or the toolbar. There are no complex dialogues or modes, just click, drag, and drop directly where you want things to be placed. Made a mistake, use the undo command. The application has multiple undo / redo capabilities.
Page backgrounds give you the ability to add a background pattern to your page. Simply click on the “Page Backgrounds” tab and then drag-and-drop your desired background from the background tray to the desired page on the book.
When applying the background you can
· Apply as “Single Page Background”- applies selected background only to page it is dropped on.
· Apply as “Two Page Background”- applies selected background to both pages of the open book.
· Apply as “Background Overlay”- applies selected background over the cur rent background, adding the new background as a lighter pattern on top of the existing background.
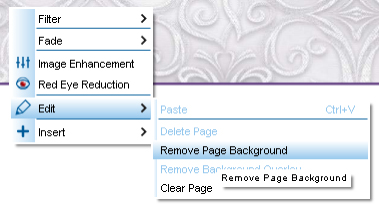
To remove a page background, simply right click on the page, go to “Edit” and select “Remove Page Background”
*You can also use any image (or clip art) as a background.
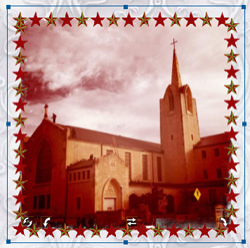
Picture Borders allows you to add a border to the pictures in your book. Simply click on the “Picture Borders” tab and then drag-and-drop your desired border from the border tray onto the desired picture. You can place several borders on top of each other by dropping another border on top of a picture that already has a border.
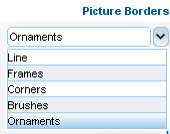
There are several different style options for borders: Line, Frames, Corners, Brushes and Ornaments. To change between the different styles, click on the drop down menu at the top of the border tray and select the desired style.
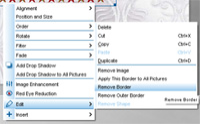
To remove a border, right click the image, go to “Edit” and select either “remove border” or “remove outer border.”
 Picture Shapes allows you to add a shape-border to the pictures in your book. Simply click on the “Picture Shapes” tab and then drag-and-drop your desired shape-border from the shape tray onto the desired picture. You can place a shape and a border together by dropping both on the image to get your desired shape with your desired border.
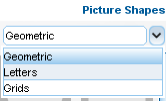
There are three style options for shapes: Geometric, Letters, and Grid. To change between the different styles, click on the drop down menu at the top of the shape tray and select the desired style.
To remove a shape, right click the image, go to “Edit” and select “remove shape.”
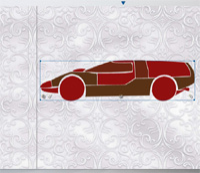
 Clipart allows you to add pre-made animations to your book. Simply click on the “Clipart” tab and then drag-and-drop your desired clip art from the clipart tray onto the desired page.
In dropping the clipart you can drop as:
§ Single Page Background
§ Two Page Background-
§ Background Overlay-
§ Add Picture applies selected clip art as a clip art on page.
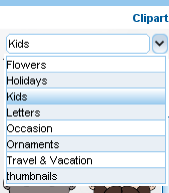
The clip art are sorted into several different themes, such as Flowers, Holidays, Kids, Letters, Occasions, Ornaments, Travel and Vacation.
To remove a clipart animation, right click the image, go to “Edit” and select “remove shape.”
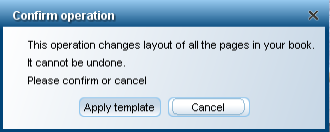
 Book templates apply themes and page layouts to your whole book or album. When first creating your project you may select a template from the wizard. If you wish to select a different one at any point during your editing process, head to the cover of your project, click on “Book Templates”, and drag-and-drop the new template on the cover.
A window confirming your desire to make this change will require you to select “Apply Template” and will then automatically switch to the new template
SHARE:
You can share your project with friends and family online, or have others order a printed copy of your project for themselves following these steps:
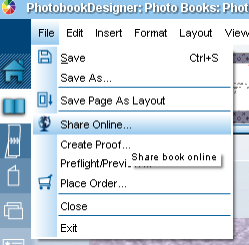
Click on File->Share Online menu command or click on the Share Online button on the task bar.
The shared book will be created and uploaded and you will be directed to a new window requiring you to fill in the title and description of your shared book as well as your email address and the email addresses you wish to share your project with.
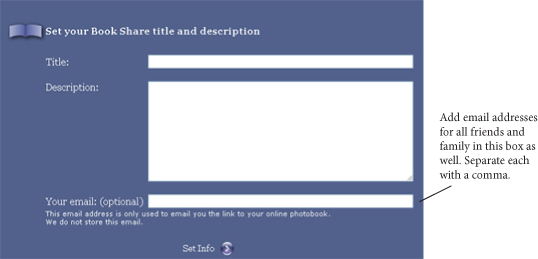
Separate the addresses with a comma. A link that allows access to the project will be emailed to the addresses, opening the link will open the Internet browser where you, friends, or family can view and order your creation.
What are all the products/projects that can be created with SuruDesigner?
SuruDesigner is a cutting edge design software that allows you to begin a variety of projects. Photobooks, Yearbooks, Calendars, Greeting Cards, Business Cards, and Photo Prints. All are fully customizable and your use for each project is limited only by the scope of your imagination.
How do I download and install SuruDesigner on my computer?
STEP 1: Visit SuruDesigner.com and click on the Windows or Macintosh download button.
STEP 2: The software will automatically begin downloading to your computer.
STEP 3: When download is finished, open the .exe file to run software installation.
STEP 4: Once the software is installed, you are free to use and enjoy it at no charge.
What is the difference between “New Book Wizard” and “Start Empty Book?”
The Easy Photobook wizard will walk you through selecting specific features of your project, add photos for use in project, arrange photos for use in project, and create the project for you. This is the fastest way to create your project. Once created, you can order it as is or do further editing.
The “Start Empty Book” will use your product selection and will start an empty project, leaving all the design work to be done by you.
How do I import/export files in SuruDesigner?
To export a file, select your project and click the “Export” button on the menu to the left. This will open a window where you can name your project file and save to your computer. (Note: Your projects are saved within the software, unless exported). Now, you can transfer that project file to any computer and open it with SuruDesigner by selecting the “Import” button on the menu to the left.
How do I add images to my project?
The Image Tray is located at the bottom of the screen. The Image Tray holds images selected to be used in the project.
Use the tools on the left of the tray to perform the following tasks:
+ = Add individual images to tray.
++ = Add a folder of images to the tray.
Ö = Hide the images already used in the project
X = Remove all images from tray.
What are the on image tools?
There are tool icons that will also appear on a selected photo that has been added to the project. You can use these tools to manipulate the image as needed.
On image rotation tools allow you to rotate the image within the frame. You can rotate clock-wise, counter clock-wise or free rotation.
The pan tool allows you to move the image inside the image frame. When combined with the zoom feature (accessible from the image tool bar or rolling the mouse wheel), you can zoom the image and place it in the frame, cropping it to your needs.
The switch image tool allows you to switch between any two images. Select this tool and drag from one image to another to switch between the two.
What is the bleed for printed projects?
When moving an item, such as text or clip art or images, a layout guiding grid will appear on your work space. There is a bold, dotted line that marks the page bleed. It is important not to place any object outside of this border in order to ensure that all page elements appear on the page/product after being printed and cut.
Is there a command for ‘undo?’
Yes. Ctrl+Z.
How do I edit text?
The Text Task Specific Toolbar appears above the project after dragging out a new text box or selecting an existing text box (also accessed by right-clicking the photo). This toolbar offers several options to manage text. This toolbar offers the following commands:
Font properties
· Font- drops down a menu of different font options
· Size- drops down a menu of different font sizes
· Style – Select the text style
Align the text within the text box
· Align left – aligns text inside box to the left edge of the box.
· Align center – aligns text inside box to center of box.
· Align right – aligns text inside box to the right of the box.
Text color – drops down color palette for selecting font color.
How do I add clip art, backgrounds, or picture frames?
It is easy to be creative by simply dragging and dropping anything (from images to backgrounds, and even clipart) from the image tray or the toolbar. There are no complex dialogues or modes, just click, drag, and drop directly where you want things to be placed. Made a mistake, use the undo command. The application has multiple undo / redo capabilities.
How do I apply a background after dragging and dropping onto the page?
When applying the background you can choose from the following options:
· Apply as “Single Page Background”- applies selected background only to page it is dropped on.
· Apply as “Two Page Background”- applies selected background to both pages of the open book.
· Apply as “Background Overlay”- applies selected background over the cur rent background, adding the new background as a lighter pattern on top of the existing background.
How do I remove a page background?
To remove a page background, simply right click on the page, go to “Edit” and select “Remove Page Background”
How do I share my project online?
Click on File->Share Online menu command or click on the Share Online button on the task bar.
The shared book will be created and uploaded and you will be directed to a new window requiring you to fill in the title and description of your shared book as well as your email address and the email addresses you wish to share your project with. Separate the addresses with a comma. A link that allows access to the project will be emailed to the addresses, opening the link will open the Internet browser where you, friends, or family can view and order your creation.
How do I order my project?
Click the green “Place Order Now” button in the top right corner. This will open a window informing you of any potential errors or blank pages present in your project. You can bypass these errors or go back and change them. You can review of a proof of your file. After certifying that you have reviewed your project and are ready to proceed to the shopping cart, click okay and your internet browser will open with your project already uploaded to the checkout process. You may complete your order there.

